300x250 AD TOP

Formulir Kontak

Nama

Email *

Pesan *

Followers

Blog Archive

Kategori

Islamic Software (45) eBook (38) System Tools (31) Kitab Digital (30) Sistem Operasi (25) Handphones (24) Download (20) Boot (19) Internet (19) Office (18) Grafis (12) Guru (10) Software Kimia (6) Tutorial (6) Linux (5) Kamus (4) Kaligrafi (3) Multimedia (3) Pemrograman (2) Serba-Serbi (2) Artikel Kimia (1) Database (1) Font (1) Hackintosh (1) Search Engine (1)
loading...

FOOD MATTERS

TRAVEL GUIDES

Most Popular

3/random/post-list

Artikel Top

PALING DIMINATI

Tampilkan postingan dengan label Sistem Operasi. Tampilkan semua postingan

Senin, 03 Desember 2012

Tagged under: , , ,

Cara memindah database Maktabah syamilah ke Memory Card

Setelah kemaren nulis Tutorial Instalasi Maktabah syamilah di Android, sekarang saya akan mencoba menulis tutorial ringan, cara Memindahkan Database Maktabah syamilah ke Memory Card, dengn tujuan agar memory internal tidak jadi Full karena Syamilah, karena jika di biarkan sesuai pengaturan Default nya maka Database akan masuk pada memory aplikasi yang ukuran nya sangat terbatas itu, misal di Samsung galaxy Ace Memory aplikasi cuma 160 mb, padahal Database maktabah syamilah ukuran nya besar jika di download semua bisa sampai 16 Giga.
Sebelum nya perlu di klasifikasikan dulu bahwa model memory penyimpanan Handset Android itu sebagai berikut  :
1.ada Handset (HP/tablet) yang punya tiga jenis penyimpanan/memory, sperti Galaxy W, Galaxy Ace Plus, Galaxy Ace 2, Galaxy S, dll. HP model ini punya tiga macam media penyimpanan,
A.memory internal khusus instalasi Aplikasi
B.memory Internal untuk nyimpan file Foto, video, dokumen, dll. Kalau di buka di File manager akan terdeteksi sebagai SDCARD
C.memory External yang kita tambahkan sendiri yang berfungsi tuk nyimpan file Foto, video, dll. Memory ini kalu di buka pakai file manager akan terdeteksi sebagai EXTERNAL_SD
2.ada juga Handset yang  tidak punya media penyimpanan Internal, sperti Galaxy MINI, Galaxy Ace, kedua nya ini adalah jenis HP yang tidak punya media Storage/penyimpanan Internal. Jenis HP seperti ini hanya tersedia dua jenis memory
A.memory internal yang berfungsi hanya untuk menyimpan Instalasi Aplikasi saja, tidak bisa untuk menyimpan File seperti Foto, video, dll
B.Memory Eksternal yang bisa kita tambahkan sendiri yang berfungsi untuk menyimpan File Foto, video, dokumen, dll
Nah ! Setelah memahami Jenis memory yang biasa di pakai dalam Handset Android, Sekarang saat nya kita ke pokok pembahasan.
Untuk memindah database Maktabah syamilah ke Memory Card berikut langkah langkah Nya.
1.bikin Folder di Memory Card (SDCARD ATAU SDCARD>EXTERNAL_SD) dengan Nama SYAMILAH (nama bebas, tidak harus Syamilah, terserah keinginan anda)
2.Pastikan aplikasi Maktabah syamilah sudah terinstal di Handset anda. (cara instal sudah di bahas di tulisan saya kemaren)
3.buka aplikasi Maktabah syamilah, anda akan menemukan menu Halaman depan Maktabah syamilah.
4.klik menu الذاكرة (yang berlambang Memory Card dengan)
5.lalu klik SDCARD, akan muncul window dgn tulisan OPEN dan SAVE
6.klik Open Lalu cari Folder SYAMILAH (Folder yang di inginkan sebagai tempat tersimpan nya Database Maktabah Syamilah) klik folder syamilah, akan muncul window degan Tulisan OPEN dan SAVE, Klik aja SAVE. sekarang database maktabah syamilah sudah Sukses di Set ke Folder SYAMILAH yang berada di memory Card. Jadi nanti semua database Maktabah syamilah yang anda download akan masuk ke folder syamilah ini, apabila anda mau Ganti HP tinggal Pindah memory nya atau Copy Folder syamilah beserta isinya ke Memory HP yang Baru, Lalu di HP yang Baru instal aplikasi Maktabah Syamilah, setelah terinstal, Lakukan Langkah Poin Nomer 3-6.
7.Jika sebelum anda memindah Folder database sudah mendownload database kitab kitab maka harus di pindah (copy/cut-Paste) ke Folder Syamilah yang di bikin ini. Atau anda download lagi saja kitab kitab nya.
NB. YANG DI MAKSUD "SDCARD" PADA POIN NOMER 5 DI ATAS ADALAH
1.SDCARD=MEMORY CARD INTERNAL DI HP YANG PUNYA 3 (TIGA) JENIS MEDIA PENYIMPANAN SEPERTI GALAXY S, GALAXY WONDER, GALAXY ACE PLUS 7500, GALAXY ACE 2. DLL
2.SDCARD=MEMORY CARD EXTERNAL DI HP YANG PUNYA 2 MEDIA PENYIMPANAN SEPERTI SAMSUNG GALAXY ACE GT 5830 dan Sejenis nya.
UNTUK JENIS HP YANG CUMA PUNYA 2 MEDIA PENYIMPANAN (intrnal tuk aplikasi dan External Memory card) KAYAK GALAXY ACE GT-5830 maka cara di atas otomatis menempatkan Database Syamilah di Kartu memory external.
Sedangkan untuk HP yang punya 3 media penyimpanan maka Cara di atas menempatkan Maktabah syamilah pada memory Card Internal, jika anda ingin menyimpan nya pada Memory External nya maka langkah Poin No 6 di atas sebelum Mencari Maktabah Syamilah Anda cari dulu Folder dengan Nama EXTERNAL_SD, Klik folder itu, Lalu Cari Folder Syamilah (jika anda telah membuat nya, jika belum membuat nya, maka buatlah dulu di EXTERNAL_SD)
Tagged under: , ,

Kamus Indonesia Arab Al-Munawwir Untuk Android

Alhamdulillah ! Sekarang sudah tersedia Kamus Al-munawwir Versi digital Format DJVU dan PDF, kali ini saya akan berbagi tips tentang cara Penggunaan dan Fitur yang di miliki oleh kamus Al-munawwir versi digital ini.
To the point aja, untuk bisa menjalakan Kamus Al-munawwir di Handset Android, berikut langkah langkah nya.
1.download File kamus Al-munawwir, saya rekomendasikan yang format DJVU , klik DISINI  atu anda bisa cari di Googel, Simpan File itu di memory HP anda, terserah di mana saja asalkan anda ingat nama Folder penyimpanan nya.
2.download aplikasi EBOOKDROID di Playstore
3.Buka aplikasi Ebookdroid lalu Browse/Telusuri File Al-Munawwir yang sudah anda simpan tadi di memory Card, setelah ketemu klik aja File Almunawwir tuk membuka nya.
4.pertama kali membuka, aplikasi akan membaca semua halaman Kamus Almunawwir, tunggu saja beberapa detik, setalah selasai Tampilan Halaman Al-munawwir akan muncul di Layar HP anda. Selanjut nya jika anda ingin membuka Kamus Al-munawwir maka tinggal Buka Aplikasi EbookDroid.
5.anda bisa memanfaatkan fitur pencarian tapi khusus mencari kata Bahasa indonesia nya (terjemahnya)
6.anda juga bisa dengn Mudah mencari Mufrodat bersasarkan Abjad  ب ، Ø­، ص ، dll.

Untuk berpindah antar Abjad itu, caranya adalah :
A.klik menu di aplikasi ebookdroid (di sebagian HP pakai tombol menu HP)
B.klik OUTLINE
C.akan muncul halaman abjad, dari alif-ya'.
Anda bisa lihat tampilan screen shot nya di bawah ini.
Selamat mencoba dan menikmati.

Sabtu, 06 Oktober 2012

Tagged under: ,

Bluestack Android Emulator : Menjalankan Aplikasi Android Di Windows PC

Sebelumnya saya sudah pernah share YouWave Android 2.1.2 - Android Simulator yang bisa sobat gunakan untuk menjalankan Aplikasi Android. Nah, sekarang sudah ada aplikasi sejenis yang tentunya tidak kalah canggih dengan software YouWave Android 2.1.2 - Android Simulator.

Software tersebut bernaman BlueStacks yang juga merupakan software yang bisa kita gunakan untuk menjalankan berbagai macam aplikasi yang biasanya digunakan pada Gadget Android. Hampir semua aplikasi Android bisa kita jalankan menggunakan software BlueStacks ini di komputer Windows sobat. Tetapi saran saya untuk mendapatkan kualitas yang bagus dan sobat bisa nyaman menggunakan BlueStacks ini, sebaiknya sobat menggunakan Windows XP 3 atau menggunakan Windows 7. Baiklah buat sobat yang membutuhkan software ini, silahkan langsung saja didownload, cekidot...

Tampilan Program :

 DOWNLOAD BLUESTACK
Semoga dapat bermanfaat untuk sobat.
[ http://asis-sugianto.blogspot.com/2012/05/cara-menjalankan-aplikasi-android-di.html]

Sabtu, 07 April 2012

Tagged under: , ,

Norton Ghost Universal Alternatif : Backup and restore with Acronis Universal Restore

Backup to USB, Create Acronis Bootable Media, Restore with Acronis Universal Restore
Step-by-step instructions on how to:

Back up the whole hard disk drive to an external USB Hard drive;
Create Acronis Bootable Media;
Restore the backup from external USB Hard drive using Acronis Universal Restore.

Applies to:

    * Acronis True Image Echo Server for Windows with Acronis Universal Restore
    * Acronis True Image Echo Enterprise Server with Acronis Universal Restore
    * Acronis True Image Echo Workstation with Acronis Universal Restore
    * Acronis True Image for Microsoft Windows Small Business Server with Acronis Universal Restore

(!) Acronis Universal Restore is a separate add-on.

(!) Acronis True Image Home does not support Acronis Universal Restore.

This document contains step-by-step instructions on how to migrate your system to a machine with dissimilar hardware.

The entire migration process described here consists of the following steps:

   1. Backing up your system partition to a USB hard drive;
   2. Creating Acronis Bootable Rescue Media with Acronis Universal Restore;
   3. Restoring the backup to a machine with dissimilar hardware.

Step 1: Backing up your system partition to a USB hard drive

   1. Run Acronis True Image Echo;

   2. In the main window of the program click Backup to start the Create Backup Wizard:

   3. On the welcome screen click Next:

   4. Click My Computer to create a backup of the whole hard disk drive or the system partition, including all the data and partition structure:

   5. On the Partitions Selection screen select the partitions or the whole hard disk drive you want to back up:

      (!) If you are not going to back up the whole hard disk drive, make sure you back up the system partition.

   6. On the Source Files Exclusion screen you can exclude files from the backup archive:

   7. On the Backup Archive Location screen select your external USB hard disk drive:

   8. On the Select Backup Mode choose Create a new full backup archive:

   9. On the Choose Backup Options screen select to go with the default options or set the options manually:

  10. On the Archive Comments screen put any information about the backup that you might find useful:

  11. On the final screen check the summary of the planned operation and click Proceed to start the backup:

  12. After you click Proceed the backup process will start:

  13. After the backup process completes successfully you will the notification:

Step 2: Creating Acronis Bootable Rescue Media with Acronis Universal Restore

Please make sure that you have Acronis Universal Restore installed on the same machine with Acronis True Image Echo. If it is installed, in the title of the product you will see Acronis True Image Echo [Edition] with Acronis Universal Restore.

   1. On the right pane of main window of the program click Create Bootable Resue Media:

   2. On the welcome screen of Acronis Media Builder click Next:

   3. On the Rescue Media Contents Selection check Acronis True Image Echo [Edition] with Acronis Universal Restore (full version):

   4. On the Bootable Media Selection screen choose your CD burner and insert a blank CD:

      You can also select ISO Image if you wish to burn the ISO to a CD later or use it to boot your Virtual Machine.

   5. On the final screen click Proceed to create Acronis Bootable Rescue CD:

Step 3: Restoring the backup to a machine with dissimilar hardware

Before restoring the backup of your machine to a machine with dissimilar hardware, please make sure you have drivers for the hard disk drive controller or chipset drivers. These drivers are critical for booting the operating system.

You can download the drivers for your motherboard on the Vendora^ۉ„¢s web-site. Please note, if you downloaded the drivers in *.exe, *.cab, *.zip format, you should extract them first.

The driver files should have *.inf, *.sys or *.oem extension.

   1. Boot the machine to which you are going to restore the backup from Acronis Bootable Rescue CD. (Remember to set the primary boot device to CD-ROM in BIOS to make the machine boot from the CD).

   2. Once booted, select Recovery:

   3. On the welcome screen of the Restore Data Wizard click Next:

   4. On the Backup Archive Selection screen choose the backup archive with system partition that you intend to recover:

   5. On the Restoration Type Selection screen choose Restore disks or partitions:

   6. On the Partition or Disk to Restore screen select the partitions you want to restore:

      The recommendation is to select partition by partition, not the whole disk to recover. In this case you will get the possibility to resize the target partition size. In most cases it is not necessary to restore MBR.

   7. On the Restored Partition Location select the target partition or unallocated space to which the backup will be restored:

   8. On the Restored Partition Type set the type Active for your system partition:

      If you do not set the type Active for your system partition, the machine will not boot.

   9. If you selected to restore only one partition instead of the whole hard disk drive, you will see the Restored Partition Size window that will let you set the size for the restored partition:

  10. On the Next Selection screen choose No, I do not if you are not going to restore other partitions at this time:

  11. On the Acronis Universal Restore screen select Use Acronis Universal Restore:

  12. On the Specifying Mass Storage Drivers screen click Add to specify drivers:

      The recommendation is to specify the drivers manually. Hardware Vendors usually provide separate drivers for SCSI or RAID controllers. IDE or SATA drivers are usually included into the chipset drivers for the motherboard.

      The HDD controller drivers are critical for booting the operating system. Specifying drivers for other devices (video/sound card) is not recommended. Once you restore and boot the system, you can update all other drivers manually in Windows Device Manager (Start -> Run -> devmgmt.msc).

  13. On the Select File screen point to the exact driver file for the HDD controller:

  14. Select the driver that will be used:

  15. On the Restoration Options screen you can check both options: Search removable media for device drivers and Search device drivers in the following locations:

      Acronis Universal Restore will search the checked options if some drivers are missing.

  16. In Additional settings you can also check Change SID after the restoration is finished:

      If this option is enabled, the SID will be automatically changed after the restore.

  17. On the final screen you can check the summary and click Proceed:

  18. The restore process will start:

If after the restore the machine does not boot correctly, please boot in Safe Mode (hit F8) and check the drivers in Windows Device Manager.

Jumat, 14 Oktober 2011

Tagged under: , ,

Android Emulator : Bluestack vs Youwave

11 Oktober itu akhirnya datang, waktu yang dijanjikan developer Bluestack untuk merilis software Alpha nya. Di indox Yahoo mail ada tulisan :

BlueStacks App Player (alpha)

This is an alpha release so please give us lots of feedback! 
Use the support tab on our Facebook page to share your ideas.
Akhirnya dengan sisa pulsa Fun Midnight Flash Telkomsel, 117 MB file installer msi sukses terdownload, meski 3 kali di-cancel dan gagal.

Buat kalian yang kurang ngerti android ato pingin banget nyicip android, anda bisa pake software BlueStacks App & YouWave. cuma dengan software ini anda tidak perlu mengisntall OS android di bios anda ataupun memiliki device android, cukup dengan pc windows anda, anda bisa mencoba dan menginstall aplikasi2 android yang sudah anda download sebelumnya. kalo mau pake yg BlueStacks, anda bisa install sendiri file apk anda dgn cara open with>cari Hd Apk Handler.exe yg ada di folder BlueStacks di program file, nanti scr otomatis akan terinstall dan bisa lgsg dicoba. kalo pake YouWave, itu cuma trial slama 4 hari, dan maap serialnya belum nemu *hehe.
bluestacks-1318332264
android-desktop_thumb
[ http://ludhpraditto.wordpress.com/category/alhasil/tech-journale/ ]

Minggu, 24 Juli 2011

Tagged under: , ,

Download Google Android Emulator

Dalam situasi menunggu Bluestack (konon sesumbarnya bisa berdampingan baik dengan windows sehingga bisa menjalankan aplikasi android dengan lancar dalam lingkungan windows) bisa didownload dan dicoba, saya tetap berusaha mencari emulator Android yang mudah diinstall dan tanpa ribet menjalankannya. Akhirnya menemukan juga file yang dimaksud. Emulator ini mudah digunakan dan lumayan cepat.
Do you want to test drive Google Android without having to buy a phone? Google SDK package allows developers to see all android features and let them use the whole interface.
If you don’t want to be bothered by the complex Google SDK Package, then RedmondPie reports that Haseeb a member at XDA-Developers forum has managed to create an executable file by packaging and configuring the Google SDK. Which means that you can now use the complete emulator in a single-click without having to install Google SDK package.
All you have to do is extract the .rar archive, rename extracted folder to “Android-Emulator”, Download and Copy fixed exe files in it, and then finally run it. These steps are rather complicated and confusing. So instead of following these steps, I have provided the direct link to download Android Emulator, just extract the zip archive and run the executable file. That’s it.
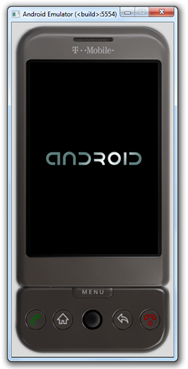
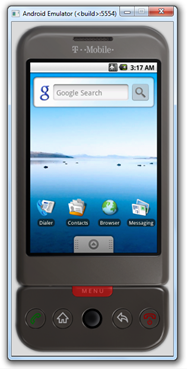
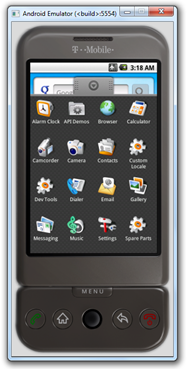
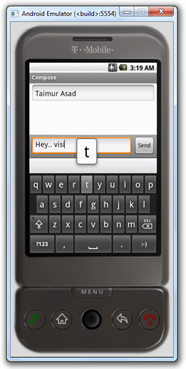
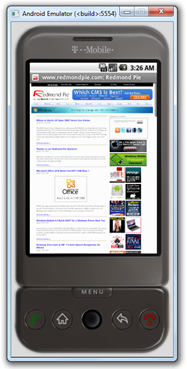
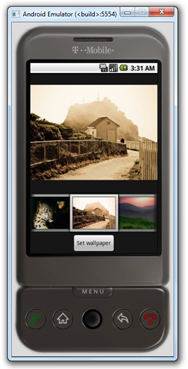
Android Emulator for Windows Google Android Menu
android call android emulator main
Download Android Emulator 1.5 for Windows (57 MB Hosted on AddictiveTips)
Enjoy!


XDA-Developers forum member xda2_haseeb has managed to extract and run AndroidEmulator on Windows which comes as a part of Google Android SDK package. For those of you who want to take Android on a ride for general OS look and feel can use this standalone Android Emulator which is patched to run on a Windows PC as a standalone app without having to download and install the complete Android SDK.
Android Emulator for Windows Android Emulator for Windows
Android Emulator for Windows
Android on Windows 7
Installation instructions for standalone Android Emulator on Windows
1. Download Android Emulator v1.5 for Windows. 
2. Extract the contents of the .rar file. 
3. Now rename the extracted folder to "Android-Emulator". 
4. Download the patched executable files from here. 
5. Copy/Paste these patched files into the newly named “Android-Emulator” folder.
That’s it! You can now test and run the complete emulated mobile Android OS on your computer without having to download and install the SDK. You can even install Android compatible apps on it. Check out this link for more on installing apps and moving files on and off the phone. I have tested it on Windows 7 x64 and it works flawlessly on it. Now if only someone could come up with a way to install HTC Hero’s Sense UI on it!
Download Android Emulator 1.5 for Windows

Rabu, 20 Juli 2011

Tagged under: ,

HAIKU-OS Alpha 3 LiveCD : Sistem Operasi Multimedia Gratis dan Ringan


Tak sengaja mendapati iklan MIDNIGHT FLASH UNLIMITED nya Telkomsel, akhirnya dengan merelakan pulsa 25 ribu, modem Etisalat 1550E dengan memakai softwarenya modem Sun Broadband dan rela menunggu hadirnya tengah malam,  kesampaian juga mendownload HAIKU-OS Alpha 3 sebesar 230-an MB zipped dalam kurun waktu 2 jam. Namun setelah diekstrak menjadi 550-an MB. Dibantu dvd ekternal Samsung, file iso cd tersebut terbakar dengan sempurna dan bisa diboot dengan lancar tanpa pesan yang "aneh-aneh" di Netbook Advan A1N-70T 1,6 Ghz.

Haiku, sebelumnya dikenal sebagai OpenBeOS, adalah sebuah proyek sistem operasiopen source untuk menciptakan Be Operating System pada komputer x86 dan PowerPC. Dimulai sebagai "OpenBeOS" pada 2001 setelah Be dibeli oleh Palm, Inc. dan BeOS tidak lagi dilanjutkan. Pada 2004 nama baru dipilih untuk menghindari pelanggaran hak nama Palm. Proyek ini dikendalikan oleh Haiku Incorporated, sebuah perusahaan nirlaba di New York.

Setelah masuk dan mencicipi OS baru tapi dengan hati lama (BeOS), akhirnya alif dibuat kagum dan buas eh puas... Hanya aplikasi Office yang masih kurang, itupun sebetulnya bisa ditambal dengan Gobe Productive (sayang masih berbayar). Untuk urusan multimedia, file gambar standar bisa dibuka dengan cepat, bahkan file audio dan video milik saya hampir tidak ada yng tidak bisa dibuka dan dinikmati. Maklum file sekelas MP3, MP4, 3GP, Avi, MPG, Mov, MKV, RMVB, FLV dan lainnya sudah built in codec di OS ini mungkin.

Sayang sekali aplikasi penangkap screenshoot bawaan tidak berjalan dengan baik, sehingga alif hanya bisa memperlihatkan Haiku-OS berjalan diatas Qemu nya MobaliveCD 2.1.

Untuk lebih mengenal Haiku-OS :

  • Official Haiku Website
  • Haiku News (formerly The BeOSJournal) Focuses on Haiku OS news reporting, interviews, application reviews, and community events, in addition to BeOS related interests.
  • Haiku Wiki
  • HaikuHost.com Provides mirrored downloads of various "unofficial" Haiku builds; updated hourly.
  • HaikuBounties A site offering bounties to further the development of Haiku.
  • IsComputerOn A BeOS news site, focusing predominantly on Haiku.

Senin, 18 Juli 2011

Tagged under: ,

LiveCD Android v0.3 for PC


LiveAndroid is a disk image LiveCD operating system Google Android. Just record the image on the disc, placing it in the CD-ROM drive and restart your computer and you can use Android, without installing it and not touching any files on your computer

Features:
  • * OpenDNS added
  • * Audio support
  • o VirtualBox ??? Intel 8???0 AC97
  • o VMware ??? Ensoniq AudioPCI 1371/1373
  • * SD card support (512M)
  • * Ethernet (DHCP)
  • * Mouse wheel support
  • * High-resolution support (800*600, 1024*768)
  • * New Apps added
  • o Software Directory
  • o AndroidVNC
  • o PilotLines, Craigs Races, Super Mario
  • * more net card driver added
  • o Amd PCNET32 PCI
  • o Broadcom 440x/47xx
  • o CS89x0
  • o Intel PRO/100+
  • o NE2000/NE1000
  • o Realtek RTL-8129/8130/8139
http://www.filesonic.com/file/1050030421/B-03LCDA.rar
Tagged under: ,

FlashBoot v2.1c Full Version


Description:
FlashBoot is a tool to make USB disks bootable. Its primary focus are USB Flash disks, but other types of USB devices are supported as well. Making disk bootable involves formatting and copying operating system files to it. Different operating systems are supported: Windows 7/Vista, Windows XP, SysLinux-based disks, GRUB4DOS disks, Linux kernel etc.
You may create blank bootable USB flash with minimal set of system files and then manually tune it for your needs, or convert a full-featured bootable CD-ROM or floppy disk to bootable USB Flash keeping all functionality.
Most known and popular FlashBoot feature is a convertion of Windows XP/Vista/7 installation CD/DVD into bootable USB disk, useful for Windows installation on netbooks and other devices without CD/DVD drive.
System requirements for FlashBoot 2.x:
  • BIOS which supports booting from USB devices
  • Operating system: Windows XP, Windows Vista, Windows 7, Windows Server 2003, Windows Server 2008, either x86 or x64 edition
  • 256 Mbytes of RAM
  • 30 Mbytes of disk space
Note:
Setelah instal selesai, copy file license_key.xml di dalam folder Keyfile ke dalam direktory instalasi Flashboot.
Official web Flashboot

DOWNLOAD
32MB | Dropbox
Password: gotechno.tk
Tagged under:

Ghost Windows 7 Ultimate Lite Editions

Windows 7 Ultimate Lite Editions Review: Biasanya, Windows 7 OS akan mengambil sekitar 10 GB ruang ketika Anda selesai menginstal itu. Windows 7 edisi Lite hanya membutuhkan 2 sampai 6 GB setelah Anda selesai menginstal itu. Itulah ruang yang cukup bagi Anda untuk menginstal Windows 7 Ultimate Lite Editions pada drive 8 GB hard compact flash. Satu-satunya hal tentang Windows 7 Ultimate Lite Editions adalah bahwa beberapa fitur yang baru pada Windows 7 akan dihapus. Anda mungkin tidak memiliki mesin bicara yang memungkinkan Anda untuk mengontrol komputer Anda dengan suara Anda. Di sisi lain, Anda akan memiliki tema Windows 7 Aero kaca dan semua hal dasar dari Windows 7 Lite Editions. Tentu saja, Anda juga akan memiliki bagian-bagian inti baru yang unik untuk Windows 7 Lite Editions ketika Anda menginstal Windows 7 Lite Editions.

Termasuk:
  • Internet Explorer v8
  • Gadget untuk Windows 7
  • Windows media player
  • Windows Firewall
  • Parental Control
  • Driver bawaaan normal
  • Proses instalasi hanya 1,57 GB (termasuk paging dan file hibernate)
  • Image Viewer bekerja dengan baik
  • Peningkatan kompatibilitas dengan program dan game
Tidak termasuk:
  • Driver (printer, scanner, suara, fax)
  • Screen Savers
  • Wallpaper
  • Windows Media Center
  • Windows DVD maker
  • Tablet PC
  • Dukungan suara
  • Backup file
  • Tidak Perlu Paket
Minimum pencetakan persyaratan:
  • CPU: Intel Pentium 3 1,8 GHz
  • RAM: 128MB RAM
Cara Install:
  • Burn BOOTMENU.iso (ini disc 1)
  • Burn 02940.iso (ini disc 2)
  • Boot komputer dengan disk bootmenu dalam dan akan otomatis boot ke menu
  • Hit pilihan 3 dan itu harus dimulai Norton Ghost
  • Ini harus otomatis dari sana …
  • Ketika meminta untuk partisi lain kemudian masukkan disk 2 dan browsing jika tidak otomatis menemukannya dan terus
  • Akan memakan waktu sekitar 20 menit untuk menyelesaikan dan akan boot langsung ke Windows 7 setelah itu …
    Mb/128 138 Mb
DOWNLOAD | 800MB | Mediafire
PART1 - PART2 - PART3 - PART4 - PART5 - PART6

Jumat, 15 Juli 2011

Tagged under: ,

Almeza MultiSet Professional v7.9.2

Almeza MultiSet Professional v7.9.2

Almeza MultiSet Professional v7.9.2 | 8.7 Mb


Almeza MultiSet - Leader in Unattended Installation of Windows and Software. Want to create a Windows installation disk or USB Flash Drive that will automatically install the OS Windows without asking questions about username, product key, time and locale settings? At the same time your favorite applications are automatically installed, the necessary keys are entered into the registry, drivers are updated, new patches (service packs) from Microsoft are installed. It's possible and you can do it easily with Almeza MultiSet.

Almeza MultiSet will automatically install all the applications you require, either onto your original computer or onto a new one. It's an ideal solution for rebuilding your systems quickly!

Create a bootable USB Flash Drive. You can use Almeza MultiSet Professional software to create a bootable USB Flash Drive for automatic installing Windows and software onto a computer.

Create a bootable automatic installation CD/DVD. You can use MultiSet software to create a universal disk for automatic installing software onto a computer using any media (CD/DVD/Flash/Hard Drive). Automatic Installation Anywhere!

Now you can install the programs in any location and as many times as you want - just insert the disk into the CDROM, DVDROM or FlashDrive, and MultiSet will undertake the complete installation procedure for you!

Do you want to automate installation of programs but have no time to learn how to write the necessary scripts? Do you prefer simple and convenient solutions? Do you want to see the results immediately? This is just the answer you have been looking for!

Supported OS: Windows 2000, XP, Vista, Server, 7

Home Page - http://www.almeza.com/

Sabtu, 05 Maret 2011

Tagged under: , ,

Tips Mencoba Android Froyo Menggunakan Android Emulator

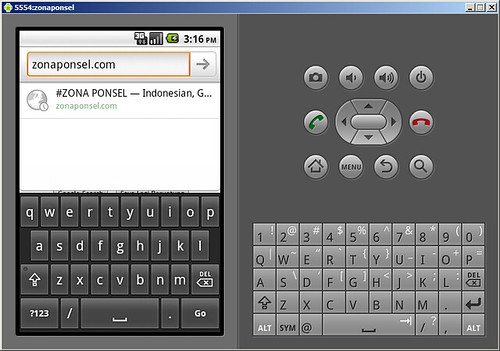
tips install android emulator
zonaponsel.com – Penasaran dengan Android Froyo ? Anda bisa mencicipi versi Android terbaru dari Google tersebut tanpa harus memiliki ponsel Android. Berikut tips mencoba Android Froyo menggunakan Google Android Emulator.
Selain untuk PC Windows, Android Emulator juga tersedia untuk Mac OS X (Intel) dan Linux. Pada tips berikut, kami menggunakan Microsoft Windows XP untuk menjalankan Android Emulator.
  1. Pastikan komputer memenuhi persyaratan system untuk menjalankan Android Emulator. Persyaratan system untuk Android Emulator dapat dilihat di sini.
  2. Install Java Development Kit (JDK) yang dapat di download di sini.
  3. Install Eclipse (Optional). Jika anda berencana untuk mengembangkan aplikasi menggunakan Android Development Tool (ADT) Plugin anda harus memasang Eclipse yang dapat di download di sini.
  4. Download Android SDK Starter Package dari alamat ini.
  5. Extract Android SDK Starter Package yang telah di download. Secara default Android SDK Starter Package akan di extract ke direktori android-sdk-windows
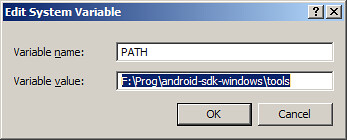
  6. Klik kanan My Computer kemudian pilih Properties. Pada System properties klikAdvanced kemudian Environment Variables. Pada System Variables klik New, isikanPATH pada Variable Name kemudian isikan lokasi direktori tools pada Variable Name. Sebagai contoh kami mengekstrak Android SDK pada direktori F:\Prog\android-sdk-windows, maka lokasi direktori tool adalah : F:\Prog\android-sdk-windows\toolscara install android emulator 1
  7. Jalankan File SDK Setup.exe untuk membuka Android SDK and AVD Manager
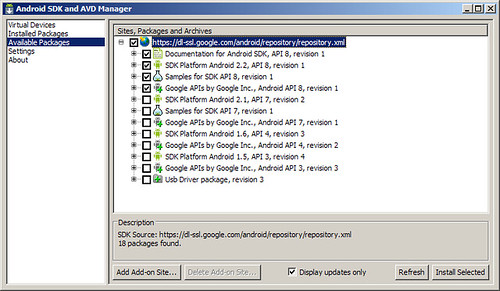
  8. Pada Android SDK and AVD Manager pilih Available Package, beri tanda centang seperti gambar di bawah kemudian Install Selected.cara install android emulator 2
  9. Setelah proses download dan instalasi selesai, pilih Virtual Device kemudian klik New
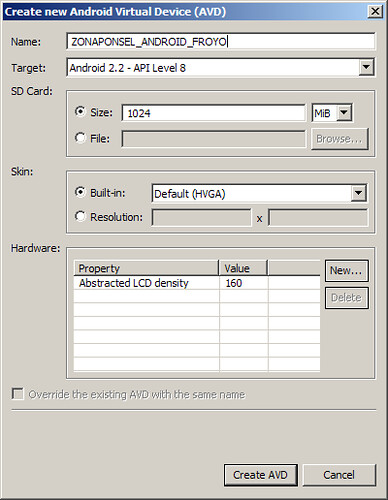
  10. Pada bagian Name isikan nama virtual device anda, Target : Android 2.2 – API Level 8kemudian klik Create AVD.tips install android emulator
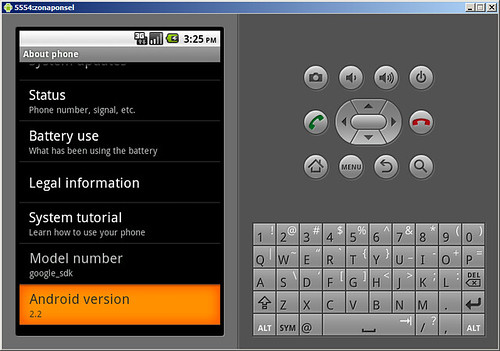
  11. Klik Start untuk menjalankan Virtual Device yang telah anda buat sebelumnya. Happy Android :D
tips install android emulator zonaponsel